This is the fourth blog post about my home network improvements series. I am sorry it is taking me so long to write all those posts, but each takes a lot of hours to write and I am balancing my life more towards family at the moment. I hope you can bear with me until the end.
Walls need to adapt to their environment
In the previous post, we presented installed the OS and set up networking and routing.
We will now see how to add another very important feature the firewall.
Creating a basic router, defining the network and routing (published)
Adding a firewall to our router (this post)
Providing basic network services, DHCP and DNS (to be published)
Testing the firewall (to be published)
Extra services (to be published, could be splitted in more than one post)
So today’s post will present a simple but secure firewall installation.
As I have said in a previous article, I want to try out nftables instead of using iptables. But we will continue iterating on the previous post and use iptables instead one more time. I want to have a working router and then I can think of switching to nftables and solving integration with other tools.
A Basic Firewall
Firewall
We will use iptables command line to populate the firewall rules. As changing those rules from the command line is not persistent, a simple reboot will restore your OS in the previous configuration so if things do not workout or if we get locked out by a wrong rule, just reboot and restart to setup your firewall. Once we will be happy with the firewall, we will save the rule set and make it permanent.
For rules, we obviously do not want any traffic coming from the WAN to establish new connections inside our LAN or on our router. Only established connections should be allowed through, e.g. an HTTP response is allowed through the firewall so that we can browse the internet. We want some network services to still function, like ICMP or DNS messages to pass through the firewall. We do not want to filter the outgoing traffic for the moment, so everything from the LAN is allowed to reach the WAN.
I like to set default policies for the different iptables chains instead of relying on the last rule to do the policy for me. However, in order to avoid getting locked out, we will set those policies at the very end and always start by defining what is allowed. In order to define our firewall, we will work first with the main chains of the filter table (the default one). Mostly caring of incoming packets and IP forwarding rules.
Providing basic network services, DHCP and DNS (to be published)
Extra services (to be published, could be splitted in more than one post)
So today’s post will present in order:
OS installation
Network interfaces configuration
Discussion on what is routing, with activation of packet forwarding, Network Address Translation (NAT) and IP Masquerading
For some items we will see today, we will start with basic functionalities that we will improve or iterate in subsequent posts. As I have said in a previous article, I want to try out nftables instead of using iptables. But many tools I would like to use to quickly create a router are still only supporting iptables as backend, and you cannot mix iptables and nftables. Such tools include systemd-networkd, Docker, or the version of firewalld which Ubuntu is currently supporting (note that firewalld version 0.6+ does support nftables as a backend). So in this first iteration and in order to relatively quickly create a basic router, we will use mostly iptables either through systemd-networkd support or via other tools.
If you administer a Ubuntu server or if you are a power user, you might have a look at these particular changes in Ubuntu before and after upgrading. They can impact your installation and the way you use it.
NTP is no longer supported (part of Universe), you should use now Chrony. My opinion is that Chrony is not a bad choice either, it’s perhaps smoother in handling leap seconds (via smearing) but obviously less accurate than NTP in the case.
The local DNS resolver is no longer dnsmasq but systemd-resolvd. For most user this should be transparent. Note that if systemd-resolvd does not receive a DNS configuration, it will fallback to using Google Public DNS.
Network will be now managed by systemd-networkd (or still by NetworkManager on the desktop) for new installation. If you upgrade, you will still have the old `/etc/network/interfaces` file (and al) and the ifup and ifdown scripts. But this is no longer installed on new installation. Instead you have systemd-networkd and netplan. For people upgrading there is (not yet) clear path to switch to the new tools if wished.
Ubuntu 18.04 offers many more changes and I’m looking forward to upgrade my desktop and server. There are other changes not mentioned above which should be evaluated before upgrading. But I consider the above ones as core element which everybody needs whatever the purpose of the server is.
For developers, I would take care with Java and the OpenJDK. Ubuntu 16.04 LTS came with OpenJDK 8 which is the current LTS version of Java. The next LTS version of Java is 11 which is not yet published. Ubuntu 18.04 will come with OpenJDK 10 (a short-term support edition) by default and will switch the default to OpenJDK 11 when it will be released (hopefully only for new installation). Ubuntu will still provide OpenJDK 8 in universe for 18.04 with security support provided until EOL of Ubuntu 16.04 LTS (so until April 2021) to offer developer a transition time (while waiting for Java 11 to be published, matured and application migrated/validated on this new platform).
I have a (now old) HP microserver with 4 HDDs. I installed Ubuntu 14.04 (then in beta) on it on a quiet Sunday in February 2014. It is now running Ubuntu 16.04 and still working perfectly. However, I’m not sure what I thought on that Sunday more than 3 years ago. I had partitioned the 4 HDDs in a similar fashion each with a partition for /boot, one for swap and the last one for a BTRFS volume (with subvolumes to separate / from other spaces like /var or /home). My idea was to have the 4 partitions for /boot in RAID10 and the 4 ones for swap in RAID0. I realised today that I only used 2 partitions for /boot and configured them in RAID1, and only used 3 partitions for swap in RAID0.
I have a recurrent problem that because each partition for /boot was 256MB, therefore instead of having 512 (RAID10 with 4 devices) I ended up having only 256MB (RAID1), and that’s not much especially if you install the Ubuntu HWE (Hardware Enablement) kernels, then you quickly have problems with unattended-update failing to install security update because there is no space left on /boot, etc. It was becoming high maintenance and with 4 kids to attend I had to remediate that quickly.
But here is the magic with Linux, I did an online reshaping from RAID1 to RAID10 (via RAID0) and an online resizing of /boot (ext4). And in 15 minutes I went from 256MB problematic /boot to 512MB low maintenance one without rebooting!
That’s how I did it, and it will only work if you have mdadm 3.3+ (could work with 3.2.1+ but not tested) and a recent kernel (I had 4.10, but should have worked with the 4.4 shipped with Ubuntu 16.04 and probably older Kernel). Note that you should backup, test your backup and know how to recover your /boot (or whatever partition you are trying to change).
Increasing the size a RAID0 array (for swap)
First this is how I fixed the RAID0 for the swap (no backup necessary, but you should make sure that you have enough free space to release the swap). The current RAID0 is called md0 and is composed of sda3, sdb3 and sdc3. The partition sdd3 is missing.
What I just did is tell MD that I need to grow the array from 3 to 4 devices and add the new device. After that, one can see that the reshape is taking place (it was rather fast because the partitions were small, only 256MB). After that first operation, the array is bigger but the swap size is still the same. So I “unmounted” or turn off the swap, recreated it using the full device and “remounted” it. I grepped for the swap in my `/etc/fstab` file in order to see how it was mounted, here it is using the UUID. So when formatting I reused the same UUID so I did not need to change my `/etc/fstab`.
Converting a RAID1 to RAID10 array online (without copying the data)
Now a bit more complex. I want to migrate the array from RAID1 to RAID10 online. There is no direct path for that, so we need to go via RAID0. You should note that RAID0 is very dangerous, so you should really backup as advised earlier.
Converting from RAID1 to RAID0 online
The current RAID1 array is called m1 and is composed of sdb2 and sdc2. I’m going to convert it to a RAID0. After the conversion, only one disk will belong to the array.
$ sudo mdadm --grow /dev/md1 --level=0 --backup-file=/home/backup-md0
$ cat /proc/mdstat
md1 : active raid0 sdc2[1]
      249728 blocks super 1.2 64k chunks
$ sudo mdadm --misc --detail /dev/md1
/dev/md1:
        Version : 1.2
  Creation Time : Sun Feb  9 15:13:33 2014
     Raid Level : raid0
     Array Size : 249664 (243.85 MiB 255.66 MB)
   Raid Devices : 1
  Total Devices : 1
    Persistence : Superblock is persistent

    Update Time : Tue Jul 25 19:27:56 2017
          State : clean
 Active Devices : 1
Working Devices : 1
 Failed Devices : 0
  Spare Devices : 0

     Chunk Size : 64K

           Name : jupiter:1  (local to host jupiter)
           UUID : b95b33c4:26ad8f39:950e870c:03a3e87c
         Events : 68

    Number   Major   Minor   RaidDevice State
       1       8       34        0      active sync   /dev/sdc2
I printed some extra information on the array to illustrate that it is still the same array but in RAID0 and with only 1 disk.
Converting from RAID0 to RAID10 online
$ sudo mdadm --grow /dev/md1 --level=10 --backup-file=/home/backup-md0 --raid-devices=4 --add /dev/sda2 /dev/sdb2 /dev/sdd2
mdadm: level of /dev/md1 changed to raid10
mdadm: added /dev/sda2
mdadm: added /dev/sdb2
mdadm: added /dev/sdd2
raid_disks for /dev/md1 set to 5
$ cat /proc/mdstat
md1 : active raid10 sdd2[4] sdb2[3](S) sda2[2](S) sdc2[1]
      249728 blocks super 1.2 2 near-copies [2/2] [UU]
$ sudo mdadm --misc --detail /dev/md1
/dev/md1:
        Version : 1.2
  Creation Time : Sun Feb  9 15:13:33 2014
     Raid Level : raid10
     Array Size : 249664 (243.85 MiB 255.66 MB)
  Used Dev Size : 249728 (243.92 MiB 255.72 MB)
   Raid Devices : 2
  Total Devices : 4
    Persistence : Superblock is persistent

    Update Time : Tue Jul 25 19:29:10 2017
          State : clean
 Active Devices : 2
Working Devices : 4
 Failed Devices : 0
  Spare Devices : 2

         Layout : near=2
     Chunk Size : 64K

           Name : jupiter:1  (local to host jupiter)
           UUID : b95b33c4:26ad8f39:950e870c:03a3e87c
         Events : 91

    Number   Major   Minor   RaidDevice State
       1       8       34        0      active sync set-A   /dev/sdc2
       4       8       50        1      active sync set-B   /dev/sdd2

       2       8        2        -      spare   /dev/sda2
       3       8       18        -      spare   /dev/sdb2
As the result of the conversion, we are in RAID10 but with only 2 devices and 2 spares. We need to tell MD to use the 2 spares as well if not we just have a RAID1 named differently.
$ sudo mdadm --grow /dev/md1 --raid-devices=4
$ cat /proc/mdstat
md1 : active raid10 sdd2[4] sdb2[3] sda2[2] sdc2[1]
      249728 blocks super 1.2 64K chunks 2 near-copies [4/4] [UUUU]
      [=============>.......]  reshape = 68.0% (170048/249728) finish=0.0min speed=28341K/sec
$ sudo mdadm --misc --detail /dev/md1
/dev/md1:
        Version : 1.2
  Creation Time : Sun Feb  9 15:13:33 2014
     Raid Level : raid10
     Array Size : 499456 (487.83 MiB 511.44 MB)
  Used Dev Size : 249728 (243.92 MiB 255.72 MB)
   Raid Devices : 4
  Total Devices : 4
    Persistence : Superblock is persistent

    Update Time : Tue Jul 25 19:29:59 2017
          State : clean, resyncing
 Active Devices : 4
Working Devices : 4
 Failed Devices : 0
  Spare Devices : 0

         Layout : near=2
     Chunk Size : 64K

  Resync Status : 99% complete

           Name : jupiter:1  (local to host jupiter)
           UUID : b95b33c4:26ad8f39:950e870c:03a3e87c
         Events : 111

    Number   Major   Minor   RaidDevice State
       1       8       34        0      active sync set-A   /dev/sdc2
       4       8       50        1      active sync set-B   /dev/sdd2
       3       8       18        2      active sync set-A   /dev/sdb2
       2       8        2        3      active sync set-B   /dev/sda2
Once again, the reshape is very fast but this is due to the small size of the array. Here what we can see is that the array is now 512MB but only 256MB are used. Next step is to increase the file system size.
Increasing file system to use full RAID10 array size online
This cannot be done online with all file systems. But I’ve tested it with XFS or ext4 and it works perfectly. I suspect other file systems support that too, but I never tried it online. In all cases, as already advised, make a backup before continuing.
$ sudo resize2fs /dev/md1
resize2fs 1.42.13 (17-May-2015)
Filesystem at /dev/md1 is mounted on /boot; on-line resizing required
old_desc_blocks = 1, new_desc_blocks = 2
The filesystem on /dev/md1 is now 499456 (1k) blocks long.

$ df -Th /boot/
Filesystem     Type  Size  Used Avail Use% Mounted on
/dev/md1       ext4  469M  155M  303M  34% /boot
When changing the /boot array, do not forget GRUB
I already had a RAID array before. So the Grub configuration is correct and does not need to be changed. But if you reshaped your array from something different than RAID1 (e.g. RAID5), then you should update Grub because it is possible that you need different module for the initial boot steps. On Ubuntu run `sudo update-grub`, on other platform see `man grub-mkconfig` on how to do it (e.g. `sudo grub-mkconfig -o /boot/grub/grub.cfg`).
It is not enough to have the right Grub configuration. You need to make sure that the GRUB bootloader is installed on all HDDs.
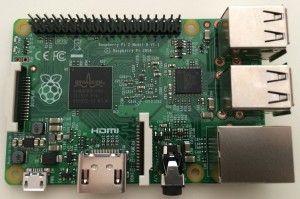
This article will describes the steps to install Ubuntu Server 16.04 on a Raspberry Pi 2. This article provides extra steps so that no screen or keyboard are required on the Raspberry Pi, it will be headless. But of course you need a screen and keyboard on the computer on which you will download the image and write it to the MicroSD card. It is similar to a previous article about installing Debian on Raspberry Pi 2, also headless mode.
Disclaimer: you need to know a minimum about computer, operating system, Linux and Raspberry Pi. If you just want to install an Operating System on your Raspberry Pi, get NOOBS the Raspberry Pi Foundation installer. This guide is for more advanced users. If you follow this guide but do mistakes, you might wipe out disk content or could even brick Micro SD card or what not.
Known limitations: This guide will not work for Raspberry Pi 3 (unless you follow these extra steps to boot the Ubuntu Server raspi2 image on a Raspberry Pi 3) and currently cannot work easily on Raspberry Pi 3 B+ because there are no specific DTB on Ubuntu (Linux kernel device tree blob, although some people on Fedora 28 beta are successful by simply renaming the DTB from the Raspberry Pi 3 model) and one need a new uboot for this model (which in the Ubuntu Server images is an “older” version not currently supporting the new 3 B+ model, and even the Raspberry Pi 2 image for Bionic Beaver, the current development version which will become Ubuntu 18.03, does not support it yet).
Install the Ubuntu Server image
Grab your official Ubuntu Server for Raspberry Pi 2 image (the latest version at time of writing is ubuntu-16.04.4-preinstalled-server-armhf+raspi2.img.xz but in a few days the image for Ubuntu 16.04.4 should be available, it will save you some time when upgrading it (and save some write cycles on your Micro SD card). Once downloaded, you need to insert the Micro SD card on your computer (you probably need a USB card reader for that) and try to figure out which device it corresponds to, see the Ubuntu documentation for further guidance. I assume you know what you do but be weary that the next command if done on the wrong device could wipe out the data on that device. I do not take any responsibility if things go wrong.
Then make sure to sync your media data and then mount the newly created partition (normally there are 2 partitions created, we are interested in the second one, it should be named <device>p2 or <device>2:
As the Raspberry Pi uses an ARM processor and the computer on which I created the Micro SD card is a x86_64 processor, I cannot simply chroot and execute adduser in the newly mounted partition. The programs are compiled for a different architecture. So to add a new user we will need to do it manually by editing system files. We will create a new user and group, then add the corresponding entries in the files where the passwords are kept.
Add a new user (replace $(whoami) by your username if you want a different username than your current one).
$ echo "$(whoami):x:1000:1000:<Full Name>:/home/$(whoami):/bin/bash" | sudo tee -a /mnt/rpi/etc/passwd
Now create your group by editing /mnt/rpi/etc/group:
$ echo "$(whoami):x:1000:"" | sudo tee -a /mnt/rpi/etc/group
Now edit the group password database:
$ echo "$(whoami):*::$(whoami)" | sudo tee -a /mnt/rpi/etc/gshadow
And the user passsword database (it will have no default password but allow SSH key base authentication over the network and it will request to set a password upon first login. Note that with this configuration remote SSH login cannot happen without the SSH key, so it is a secure configuration):
$ echo "$(whoami)::0:0:99999:7:::" | sudo tee -a /mnt/rpi/etc/shadow
Grant your user access to administrative tasks (via sudo), but still requires that the user enter his own password:
$ echo "$(whoami) ALL=(ALL) ALL" | sudo tee /mnt/rpi/etc/sudoers.d/20_$(whoami)_superuser
User home folder and SSH access
Now we shall create the user’s home and add the SSH public key so we can login (it is assumed that you have a public RSA key under your home directory named ~/.ssh/id_rsa.pub change the name if it’s different):
Setup Systemd for enabling SSH access and headless mode
Normally everything else should be correctly setup. However you might want to have a look at systemd configuration, mostly of interests are which default target is in use (for headless you want multi-user.target) and if the SSH service is part of the default target. What I did was the following (it also avoid creating the ubuntu user):
$ cd /mnt/rpi/lib/systemd/system
$ rm -f default.target
$ ln -s multi-user.target default.target
$ cd /mnt/rpi/etc/systemd/system/multi-user.target.wants
$ ln -s /lib/systemd/system/ssh.service ssh.service
(if the last command fails because the file already exist then it is all OK)
Start Ubuntu Server on Raspberry Pi 2
Now unmount the card and eject it: sudo umount /mnt/rpi. You can now safely insert the card in your Raspberry Pi 2 and boot it. It boots slower than with Raspbian, so be patient. Note that with all the above configuration, you do not need to boot with a keyboard or screen attached to your Raspberry Pi. Only an Ethernet cable and the power plug are necessary.
Now you need to find your newly installed Ubuntu Server on your network, the default hostname is ubuntu so you could always start with that (ssh $(whoami)@ubuntu) if it is not in conflict with another device of yours and if your router is clever enough to have updated the DNS resolver. Or else you need to scan your network for it. To scan your network you need to know your subnet (e.g. 192.168.1.0 with a netmask of 255.255.255.0) and have nmap installed on your computer (sudo dnf install nmap will work for Fedora, and it is as easy for Debian/Ubuntu-based distros as well, just replace sudo apt-get install nmap).
$ sudo nmap -sP 192.168.1.0/24
Of course you need to adapt the above command to your subnet. The “/24” part is the netmask equivalent of 255.255.255.0. I recommend running the above command with sudo because it will display the MAC address of all the discovered devices which will help you spot your Raspberry Pi as nmap is displaying the vendor attached to each MAC address. See for yourself in the example output:
Starting Nmap 6.47 ( http://nmap.org ) at 2015-07-19 20:12 CEST
(...)
Nmap scan report for ubuntu.lan (192.168.1.9)
Host is up (0.0060s latency).
MAC Address: B8:27:EB:1E:42:18 (Raspberry Pi Foundation)
(...)
Nmap done: 256 IP addresses (8 hosts up) scanned in 2.05 seconds
Now you can simply connect to your RPi using SSH:
ssh $(whoami)@192.168.1.9
Enter passphrase for key '~/.ssh/id_rsa':
You are required to change your password immediately (root enforced)
Welcome to Ubuntu 16.04.1 LTS (GNU/Linux 4.4.0-1017-raspi2 armv7l)

(...)

142 packages can be updated.
69 updates are security updates.

(...)

WARNING: Your password has expired.
You must change your password now and login again!
(current) UNIX password:
Now that you are authenticated and have access to your newly installed Ubuntu Server, it is time to upgrade it.
Upgrade Ubuntu Server to latest packages
The tool tmux should already be installed on your system (or do sudo apt install tmux), so use it to create a new session, so even if you get a network problem your session is not killed (simply do tmux attach)
Note: it is possible that unattended-upgrade kicks in before you can do the upgrade manually. Then wait an hour or more (depending on the speed of your internet connection and Micro SD card mainly) before doing the above steps. It is still worth while as the dist-upgrade command will perform more thorough upgrade (potentially removing deprecated packages or even downgrading some if necessary) but you will be in sync with the latest and greatest Ubuntu Server.
Picture credits: Photo of a Raspberry Pi board by me, see the website licensing policy. Ubuntu Circle of Friends logo is copyright by Canonical.
I’ve been toying around with containers using LXC, and I decided to use this technology to do some performance technique for a PHP web application. So I set-up a VM with Ubuntu 14.04 LTS and decided to use containers to test various stacks, e.g. MySQL 5.5 + PHP 5.6 + Nginx 1.4.6 vs MariaDB 10 + PHP 7 RC3 + Nginx 1.9 (and all possible combinations), and HTTP/2, latencies, etc. On top of this experiment I wanted to learn more about Ansible.
Therefore my needs were the following:
One account to rule them all: one user account on the VM with sudo privileges. Used by Ansible to administer the VM and its containers.
Run each container as unprivileged ones.
Each container is bound to one unique user.
As of Ansible 1.8, LXC containers are supported, but as second class citizen: this extra module needs some dependency to work (which are not in the default repositories) and it would hide me how to configure the LXC containers, so I discarded this solution.
Unprivileged containers using the LXC command line UI
Standard containers usually run as root and the root user within that container maps to the root user outside of the container. This is not exactly how I think of a container.
Real Container
In my view, a container is meant to hold something which I don’t want to leak out of the container, a chroot on steroids! So although I was really looking forward for containers on Linux, the first implementation were not matching my expectations or use cases.
Being able to run unprivileged containers is one of the great thing which finally decided me to check those containers on Linux, they finally cut the mapping between the privileged users on the host and those in the container.
Setting up LXC unprivileged containers require a few more packages, especially for the user and group IDs mapping, some preliminary account setup and giving LXC proper access to where you store the LXC containers data in your home folder. I did all of this, including setting up ACLs for the access. But when I hit lxc-start (...) it all failed!!!
Container in Distress
What I did after all preliminary configurations was:
$ sudo -H -u dbusr lxc-create -t download -n mysql55 -- --dist ubuntu --release trusty --arch amd64
$ sudo -H -u dbusr lxc-start -n mysql55 -d
lxc-start: lxc_start.c: main: 344 The container failed to start.
lxc-start: lxc_start.c: main: 346 To get more details, run the container in foreground mode.
lxc-start: lxc_start.c: main: 348 Additional information can be obtained by setting the --logfile and --logpriority options
And the lxc-start command failed miserably.
Why? A bit of background first, I will try to describe at a high level how containers “contain” on Linux. LXC should not really be compared to Solaris Zones or FreeBSD Jails. LXC uses Linux Control Groups (cgroups) to contain (allow/restricting/limiting) access by some process to some resources (e.g. CPU, memory, etc.). When one creates a “local” session on Ubuntu 14.04 LTS (and this is still valid on the up-coming Ubuntu 15.10 as of writing), such as login through the console or via SSH, Ubuntu allocates for the user different control groups controllers which can be viewed by doing:
Each line is a type of control group controller assigned to the user. For example the line about memory concerns the Memory Resource Controller which can be used for things such as limiting the amount of memory a group of process can use.
So when I run my script via Ansible, Ansible first establish a SSH session using my “rule-them-all” user, an SSH session is considered “local” and PAM is triggering systemd-logind to create automatically cgroups for my user shell process. Yes, even-though Ubuntu 14.04 LTS is still using upstart for init system, it has already a few dependencies on systemd! Now my “rule-them-all” user, when he is using sudo to execute commands as another user (be it root or one of my container users), the executed command is not considered as a “local” session for the sudo-ed user. So no cgroups are created for the new process, and it actually inherit the cgroups of the callee. This is easily visible by doing, you can see that the username and UID did not change despite the command being run as another user:
This usually does not really matter, unless you are LXC and you use cgroups heavily!! So what happened is that lxc-start wanted to write to the various cgroups to create the container. But lxc-start was called by the user dbuser (via the sudo command), however the cgroups it inherited were from my “rule-them-all” user and obviously (and thankfully) dbuser does not have the right to change the cgroups of my “rule-them-all” user. So lxc-start failed due to some permission denied:
lxc_container: cgmanager.c: lxc_cgmanager_create: 299 call to cgmanager_create_sync failed: invalid request
lxc_container: cgmanager.c: lxc_cgmanager_create: 301 Failed to create hugetlb:mysql55
lxc_container: cgmanager.c: cgm_create: 646 Error creating cgroup hugetlb:mysql55
lxc_container: start.c: lxc_spawn: 861 failed creating cgroups
lxc_container: start.c: __lxc_start: 1080 failed to spawn 'mysql55'
lxc_container: lxc_start.c: main: 342 The container failed to start.
Getting Ubuntu 14.04 LTS ready to run our Unprivileged Containers
I did not manage to solve the problem on Ubuntu 14.04 LTS in a first attempt. But after some extra steps (which I will details below), I made it work on the up-coming Ubuntu 15.10 (still alpha) release! So revisiting my Ubuntu 14.04 LTS setup, I identified the required packages needing an upgrade: kernel, lxc and cgmanager (and a few dependencies). For the Kernel, I’ve used the latest Ubuntu LTS Enablement Stack and upgraded to kernel 3.19. For the other packages, despite my aversion for 3rd party repositories, I decided to trust the Ubuntu LXC team (they are the ones who do the work to get LXC/LXD in Ubuntu in the first place) and their LXC PPA. So the commands were:
The lxc-templates package are necessary for me as I’m using the “download” template. The uidmap is mandatory for unprivileged containers. And libpam-cgm is necessary to resolve my problem, it is a PAM module for the cgmanager which is the Control Group Manager daemon (installed as a dependency to LXC on Ubuntu).
Now armed with this updated kernel and container stack it is time to present you the extra setup steps I was talking about. We need first to update either (or both depending which method you use) the PAM configuration for sudo or su. I will show the extra line for the former, they should apply for the later if you wish to use it. You need to edit as root the file /etc/pam.d/sudo and add the following lines after the line ‘@include common-session-noninteractive‘:
The above 2 lines will register the new session created by sudo with the systemd login manager (systemd-logind). That’s the guy we wanted notified so that the creation of the cgroups for our user can now work. I’m still scouring the internet for the exact explanation of how this work. If I find it, I will probably write another post with the information.
If I would simply use su -l userdb or sudo -u userdb -H -s, I would just have to execute the following:
$ sudo cgm create all $USER
$ sudo cgm chown all $USER $(id -u) $(id -g)
$ cgm movepid all $USER $$
This will create all cgroups under the user $USER which is userdb. It will then set the owner of these new cgroups to the UID and GID of the userdb. And the last command move the SHELL process ($$) within these new cgroups. Then, the rest is trivial:
$ lxc-start -n mysql55 -d
And it is working. And if you want to run those commands using sudo, this is how you do it:
If you close later the SSH session and you reconnect to it, you have to run the 2 commands again, even though it might display some warning that the paths or what-not are already existing. I still have those pesky warning and extra commands which I’m not sure why I still have.
Conclusion
While trying to run unprivileged containers on Ubuntu 14.04 LTS I’ve met several problems which I could only solved by using the latest LXC and CGManager packages and some special PAM configuration for which I’m not 100% sure of the impact. So unprivileged LXC containers on Ubuntu 14.04 LTS is still quite rough.
But during my journey with LXC, I’ve found an even easier way to create unprivileged LXC containers, without touching PAM, but still requiring the latest LXC and CGManager packages. This solution is based on LXD, the Linux Containers Daemon. There is a really good getting started guide by Stéphane Graber, the man behind LXD. I’m exploring this avenue at the moment and will report soon on this very blog.
All of this make me really look forward to the next Ubuntu LTS due to next Spring, the newer LXC and the under-heavy-development LXD will be part of Ubuntu 16.04 LTS and this could give a really great experience out-of-the-box with Linux Containerisation powers.
A headless server by definition has no input devices such as a keyboard or a mouse which provides a great deal of external randomness to the system. Thus, on such a server, even if using rotational hard disks, it can be difficult to avoid the depletion of the Linux kernel’s random entropy pool. A simplified view of this situation is if the entropy pool is deemed too low, one of the “dices” which generates random numbers is getting biased. This is can be even more exacerbate on server hosted in virtual machines, but this article won’t help you in this case.
Update 2015-08-24: the article was updated to provide some more information on TPM and commands adapted to the new systemd-based Ubuntu 15.04 and newer. When marked, use either the classic commands from Ubuntu 14.04 LTS and older or the newer ones.
The level of the kernel entropy pool can be checked with the following command:
(Note depending of the workload of your server the above result could be considered adequate or not)
What means a depleted entropy pool? It means that any call to /dev/random would be blocking until enough entropy is available. A blocking call is not usually wished, it means the application could be considered frozen until the call is freed. On the other side, calls to /dev/urandom would not be blocking in such situation, but there is a higher risk that the randomness quality of the output decreases. Such a higher risk could mean giving a higher chance for an attacker to predict your next dice roll. This could be exploitable or not and it is hard to tell, at least for me. Therefore, I tend to try avoiding having a depleted entropy pool especially for certain workload.
There are several mechanism to provide randomness sources to the entropy pool. The haveged daemon uses some CPU clock timers variation to achieve that, but it is highly dependant of the CPU being used. Other approaches are using sound cards, etc. And finally there are hardware random number generators (RNG). In my previous article, I talked briefly about the hardware RNG from the Raspberry Pi. In this article, I will present another hardware RNG which is available in many computers and servers: Trusted Platform Module (TPM).
I found the name somewhat marketing, and I’m not even sure we should trust it that much. But we will activate it only to provide a new source of entropy and nothing more. I would advise to use other source of entropy as well. Anyway, if interested the following paragraphs are describing how to achieve this, and if you decide to implement them, be reminded that I give no warranty that it will work for you nor that it won’t break things. I can only guarantee you that it worked on my machine running Ubuntu 14.04.2 LTS.
Let’s install the necessary tools and deactivate the main services (the tools launch a daemon which we don’t want to use as we will use rngd to get and verify the randomness of the TPM RNG before feeding the entropy pool).
Then, you will need to go into the BIOS/EFI settings of your computer/server and activate TPM, and possibly clear the ownership of the TPM if it happened to be owned by someone else. Of course, don’t do that if it is not your computer.
I found out that my particular BIOS option only allow clearing from the BIOS settings. Trying to do so from the OS results in the following:
$ sudo tpm_clear --force
Tspi_TPM_ClearOwner failed: 0x0000002d - layer=tpm, code=002d (45), Bad physical presence value
I also found out that my particular BIOS when clearing the ownership, deletes also the Endorsement Key (EK). When I was trying to take ownership of the TPM device (see further) I was getting the following error:
$ sudo tpm_takeownership
Tspi_TPM_TakeOwnership failed: 0x00000023 - layer=tpm, code=0023 (35), No EK
So I had to do an extra step, to generate a new EK:
$ sudo tpm_createek
After having creating a new EK, I was able to successfully take ownership of the TPM device.
$ sudo tpm_takeownership
Enter owner password:
Confirm password:
Enter SRK password:
Confirm password:
tpm_takeownership succeeded
Once all this is done, we are ready to load the TPM RNG kernel module and launch the user space tool that will use this source to feed the Linux kernel entropy pool. The user space tool are the rng-tools suite (with the rngd daemon).
Load the kernel module (to load it permanently add tpm_rng as a new line to /etc/modules):
$ sudo modprobe tpm_rng
And then install the user space tool.
$ sudo apt install rng-tools
The default configuration should be good enough. But you can check it by editing the file /etc/default/rng-tools. The default settings for rngd are to not fill more than half of the pool. I don’t advise to set it to higher, unless you really trust blindly those TPM chips. If you have installed the tool, it should already be running but if you modified the default settings then a restart is necessary.
Ubuntu 14.04 LTS
$ sudo service rng-tools restart
Ubuntu 15.04 and newer
$ sudo systemctl restart rng-tools.services
Now you can check again the available entropy with the command that I gave at the beginning of this post.
This mini how-to is to install Gnome on Ubuntu 14.04 LTS. Of course the best approach would have been to install Ubuntu Gnome in the first place. But if you didn’t (like me) and have Unity as desktop and would like Gnome (or just give it a try), check the rest of this article.
Note and disclaimer: Gnome3 will be available alongside Unity. So you can always switch back and forth between the two without troubles. However, a word of caution, as usual with system modifications, make sure you have backups available and working before proceeding. I make no guarantee that the following will work for you. I’m only stated it worked for me.
Installing Gnome Shell (aka Gnome3)
Installing the “core” Gnome 3 is rather easy. You need to have the Universe repository activated and then:
During installation of gnome-shell, you will be prompted to choose between GDM (the default Gnome Display Manager) and LightDM (an alternative Ubuntu is using by default). The main functions of these DM, from an end user perspective, is that they provide a graphical login where you can choose the user (and type a password) and choose the desktop environment to use once logged in. In addition these DM can offer things such as autologin. There is no wrong answer here. You can stick with LightDM (it is the one installed by default on UBuntu, and that’s the option I chose) or switch to GDM. In both cases, you need to choose for the session if you wish to use Gnome or Unity desktop environment.
Now you can log out and log in again (choosing Gnome for the session).
Installing some missing default Gnome Apps
This is entirely optional. If you have seen Gnome3 release notes, you will be looking for a few extra applications that are not installed by default by Ubuntu and that are available in the Universe repository. Example applications: Gnome Maps, Gnome Weather, etc.
To install them, you can either install the gnome-core package which will install a minimal Gnome applications environment to start with. Or install a complete Gnome applications environment (which includes all of gnome-core) by installing the package gnome. Or finally simply install a few goodies (a subselection of gnome) that is tailored to your needs. Here is a list of goodies that I installed (from Universe Repos):
In my previous post, I was stating that ZFS on Linux was not mature enough. The native ZFS port to Linux, although active, is still in release candidate stage and requires significant work to install. As for the ZFS FUSE version, it is still a 0.7 version not updated for long but it is easy to install on Ubuntu as it is available in the Software Centre (the link only works if your system supports the ‘apt:‘ scheme like on Ubuntu).
I have tried and installed the later, and although I cannot give any conclusion from a stability/reliability point of view, I was able to perform successfully the same steps I had performed on FreeBSD using ZFS.
This article is part of a series about remote administration of Linux-based server (actually some of the tool work on *BSD systems too). You can find all article pertaining to this series using the Tag remote-server-admin.


 This article will describes the steps to install Ubuntu Server 16.04 on a Raspberry Pi 2. This article provides extra steps so that no screen or keyboard are required on the Raspberry Pi, it will be headless. But of course you need a screen and keyboard on the computer on which you will download the image and write it to the MicroSD card. It is similar to a previous article about
  Grab your


 A headless server by definition has no input devices such as a keyboard or a mouse which provides a great deal of external randomness to the system. Thus, on such a server, even if using rotational hard disks, it can be difficult to avoid the depletion of the Linux kernel’s random entropy pool. A simplified view of this situation is if the entropy pool is deemed too low, one of the “dices” which generates random numbers is getting biased. This is can be even more exacerbate on server hosted in virtual machines, but this article won’t help you in this case.